App Parameters
ShinyProxy 3.0.0 adds support for app parameters such that the user must select some (arbitrary) parameters before starting an app.
Note: this feature requires the use of SpEL expressions, please consult that page as well.
Walk-through
This part provides an example based walk-through on using app parameters. The last section of this page contains a complete reference of all available options.
The basics
What follows is a minimal example of an app using parameters:
- id: 01_hello
  container-image: openanalytics/shinyproxy-demo
  parameters:
    definitions:
      - id: myparameter
    value-sets:
      - values:
          myparameter:
            - value1
            - value2
            - value3
When starting this app, the user gets a form where they need to select a value for the parameter:
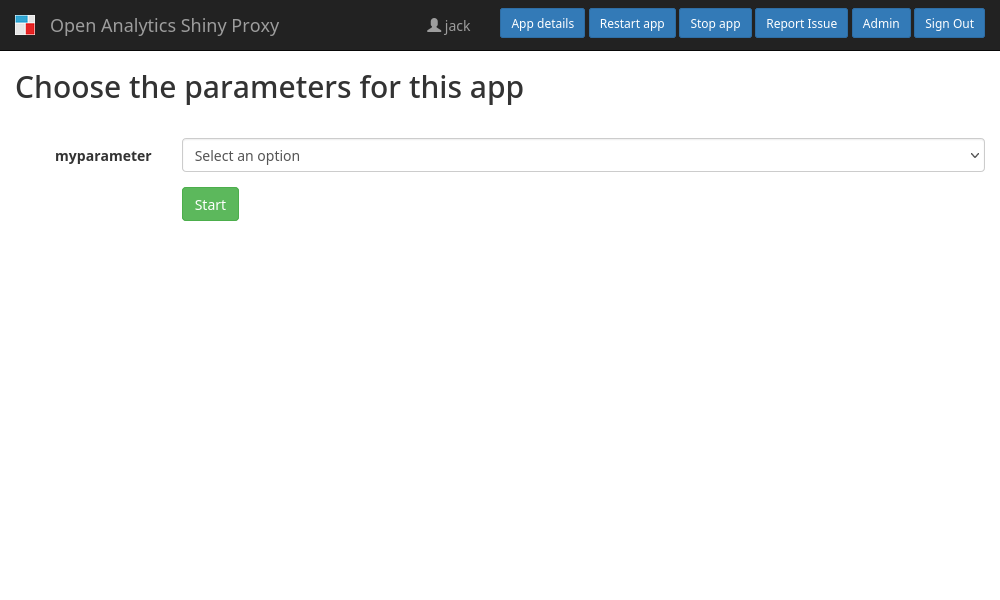
The select box contains all values defined
above (screenshot).
The configuration contains two sections definitions
and value-sets. The first section defines a list of parameters for
this app. On the other hand the value-sets
specifies which values are allowed for each parameter.
Therefore, the above example, configures a parameter called myparameter, with
allowed values value1, value2, value3. Note that ShinyProxy only allows
users to use the values from this pre-defined list, i.e. it’s not possible to
have the user enter a text message. This limitation is required for security
reasons, see the section on security considerations
Although we defined a parameter in the previous example, we are not yet using that parameter anywhere. In fact, we have to tell ShinyProxy what to do with the parameter, because by itself ShinyProxy doesn’t process the parameters in any way. In the ShinyProxy configuration you can access the selected value as a runtime value in SpEL expressions. As an example, we could pass the selected value as an environment variable to the container:
- id: 01_hello
  container-image: openanalytics/shinyproxy-demo
  container-env:
    MY_PARAMETER: "#{proxy.getRuntimeObject('SHINYPROXY_PARAMETERS').getValue('myparameter')}"
  parameters:
    definitions:
      - id: myParameter
    value-sets:
      - values:
          myParameter:
            - value1
            - value2
            - value3
When this app is started, it will have an environment
variable MY_PARAMETER with the value selected by the user.
To conclude, ShinyProxy by itself doesn’t contain any specific parameters (e.g. for CPU or memory), instead you have the complete freedom to define parameters and to use these values in (virtually) any configuration option of ShinyProxy.
Multiple parameters
When using app parameters, you probably want to define multiple parameters as demonstrated in the following example:
- id: 01_hello
  container-image: openanalytics/shinyproxy-demo
  parameters:
    definitions:
      - id: myParameter
      - id: mySecondParameter
    value-sets:
      - values:
          myParameter:
            - value1
            - value2
            - value3
          mySecondParameter:
            - a
            - b
            - c
The above example contains two parameters, the user has to select a value for
both parameters before starting an
app (screenshot). As discussed in the
previous section, ShinyProxy doesn’t accept any value other than what’s
defined in the value-sets for the specific parameter. Therefore, for the first
parameter the user can select out of value1, value2 and value3 and for the
second parameter they can (independently of the selected value for the first
parameter) choose out of a, b and c. For example, they can select value2
and c respectively. But what if you want to allow only certain combinations?
As a more concrete example, assume the following situation: users need to select
to select the amount of compute resources available to the app. The user can
choose the number of CPU cores and the amount of memory. However, because of the
underlying hardware not all combinations are possible. For example, the user
needs to use at least 16GB of memory when using 4 CPU cores (or more). This is
possible by defining multiple value-sets:
- id: 01_hello
  container-image: openanalytics/shinyproxy-demo
  container-memory-limit: "#{proxy.getRuntimeObject('SHINYPROXY_PARAMETERS').getValue('memory')}G"
  container-cpu-limit: "#{proxy.getRuntimeObject('SHINYPROXY_PARAMETERS').getValue('cpu')}"
  parameters:
    definitions:
      - id: cpu
      - id: memory
    value-sets:
      - values:
          cpu:
            - 1
            - 2
          memory:
            - 4
            - 8
            - 16
      - values:
          cpu:
            - 4
            - 8
          memory:
            - 16
            - 32
            - 64
The first value set allows users to select any combination of 1 or 2
cores with 4, 8 or 16 GB of memory. The second value set allows users to
select any combination of 4 or 8 cores with 16, 32 or 64 GB of memory.
The idea behind a value-set is thus that within a single value-set, all
combinations (of different parameters) are possible, but that value-sets are
fully independently. Hence, in this example, the user can’t select 1 CPU
core (
the first value-set) and combine it with 16 GB of memory (defined in the
second value-set). Note that there is no limitation on the number
of value-sets. In addition, the concept of value-sets is hidden to the
end-users. ShinyProxy processes all value-sets and only shows the valid
combinations (see the demo).
Finally, you can use the same value in multiple value-sets (the option
for 16 GB of memory is present in both value-sets).
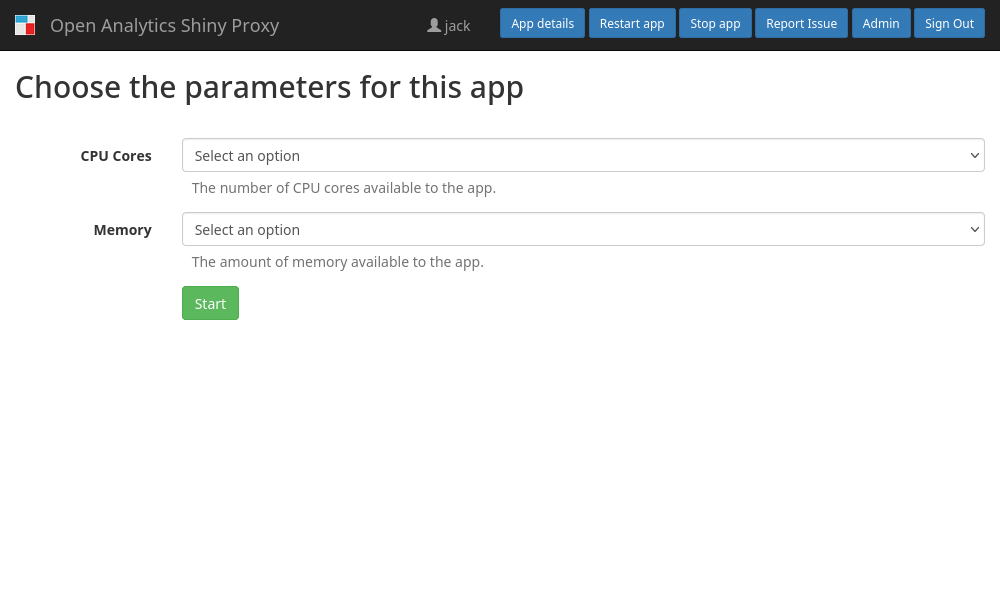
Making it fancy
In order to make the form more user-friendly, it’s possible to define
a display-name and description for each parameter:
- id: 01_hello
  container-image: openanalytics/shinyproxy-demo
  container-memory-limit: "#{proxy.getRuntimeObject('SHINYPROXY_PARAMETERS').getValue('memory')}G"
  container-cpu-limit: "#{proxy.getRuntimeObject('SHINYPROXY_PARAMETERS').getValue('cpu')}"
  parameters:
    definitions:
      - id: cpu
        display-name: CPU Cores
        description: The number of CPU cores available to the app.
      - id: memory
        display-name: Memory
        description: The amount of memory available to the app.
    value-sets:
      - values:
          cpu:
            - 1
            - 2
          memory:
            - 4
            - 8
            - 16
      - values:
          cpu:
            - 4
            - 8
          memory:
            - 16
            - 32
            - 64
Hiding the underlying values
As an example, assume there are multiple versions of an app, and you want users to select which version to use. You can achieve this by adding a parameter that specifies which container image to use:
- id: 01_hello
  container-image: "#{proxy.getRuntimeObject('SHINYPROXY_PARAMETERS').getValue('image')}"
  parameters:
    definitions:
      - id: image
    value-sets:
      - values:
          image:
            - my-registry-dev.my-company.com:v1
            - my-registry-dev.my-company.com:v2
            - my-registry-staging.my-company.com:v3
            - my-registry-staging.my-company.com:v4
            - my-registry-prod.my-company.com:v5
Although this works just fine, it could be better if we could show a more
user-friendly name to the user. This is possible by defining value-names for a
parameter, as in this example:
- id: 01_hello
  container-image: "#{proxy.getRuntimeObject('SHINYPROXY_PARAMETERS').getValue('image')}"
  parameters:
    definitions:
      - id: image
        value-names:
          - value: my-registry-dev.my-company.com:v1
            name: "DEV: v1"
          - value: my-registry-dev.my-company.com:v2
            name: "DEV: v2"
          - value: my-registry-staging.my-company.com:v3
            name: "STAGING: v3"
          - value: my-registry-staging.my-company.com:v4
            name: "STAGING: v4"
          - value: my-registry-prod.my-company.com:v5
            name: "PROD: v5"
    value-sets:
      - values:
          image:
            - my-registry-dev.my-company.com:v1
            - my-registry-dev.my-company.com:v2
            - my-registry-staging.my-company.com:v3
            - my-registry-staging.my-company.com:v4
            - my-registry-prod.my-company.com:v5
Using this configuration, the user always sees the name of the parameter
instead of the real value (e.g. DEV: v1). ShinyProxy ensures these values are
never send back to the user, so you can use them to store more sensitive
values (e.g. the name of docker images). Since the name of the values are
defined in the definition of the parameter, you only have to specify this name
once, even when re-using a value in multiple value-sets.
Adding access control
Let’s go back to the example of having the user choose the amount of compute
resources for an app. What if you want to allow only certain people to use a big
amount of resources? This is possible by specifying access control for
a value-set:
- id: 01_hello
  container-image: openanalytics/shinyproxy-demo
  container-memory-limit: "#{proxy.getRuntimeObject('SHINYPROXY_PARAMETERS').getValue('memory')}G"
  container-cpu-limit: "#{proxy.getRuntimeObject('SHINYPROXY_PARAMETERS').getValue('cpu')}"
  parameters:
    definitions:
      - id: cpu
        display-name: CPU Cores
        description: The number of CPU cores available to the app.
      - id: memory
        display-name: Memory
        description: The amount of memory available to the app.
    value-sets:
      # Usable by everyone:
      - values:
          cpu:
            - 1
            - 2
          memory:
            - 4
            - 8
            - 16
      # Usable by users in the group poweruser:
      - values:
          cpu:
            - 4
            - 8
          memory:
            - 16
            - 32
        access-control:
          groups:
            - poweruser
      # Only usable by jack and peter:
      - values:
          cpu:
            - 16
          memory:
            - 64
        access-control:
          users:
            - jack
            - peter
When a regular user tries to launch the app, they’re able to
select 1 or 2 cores and 4, 8 or 16 GB of memory. When a user that’s
part of the poweruser group tries to launch the app, they’re able
to additionally select 4 or 8 cores and 16 or 32 GB of memory. Finally,
only jack and peter are able to select the option with 16 cores and 64
GB of memory.
Note that the options which users may not use are never visible to that user.
E.g. regular users will never know there is an option available with 16 cores
and 64 GB of memory.
Another use-case might be to only show development versions of an app to developers:
- id: 01_hello
  container-image: "#{proxy.getRuntimeObject('SHINYPROXY_PARAMETERS').getValue('image')}"
  container-env:
    ENV: "#{proxy.getRuntimeObject('SHINYPROXY_PARAMETERS').getValueSetName()}"
  parameters:
    definitions:
      - id: image
        value-names:
          - value: my-registry-dev.my-company.com:v1
            name: "DEV: v1"
          - value: my-registry-dev.my-company.com:v2
            name: "DEV: v2"
          - value: my-registry-dev.my-company.com:v3
            name: "DEV: v3"
          - value: my-registry-dev.my-company.com:v4
            name: "DEV: v4"
          - value: my-registry-prod.my-company.com:v5
            name: "v5"
          - value: my-registry-prod.my-company.com:v6
            name: "v6"
    value-sets:
      - values:
          image:
            - my-registry-dev.my-company.com:v1
            - my-registry-dev.my-company.com:v2
            - my-registry-dev.my-company.com:v3
            - my-registry-dev.my-company.com:v4
        access-control:
          groups:
            - developer
        name: dev
      - values:
          image:
            - my-registry-prod.my-company.com:v5
            - my-registry-prod.my-company.com:v6
        name: prod
Note that in the above example, each value-set has an additional name
property. Using a SpEL expression, the name of the value-set is passed to the
container using the ENV environment variable. Therefore, the container easily
knows whether a dev or prod image was selected.
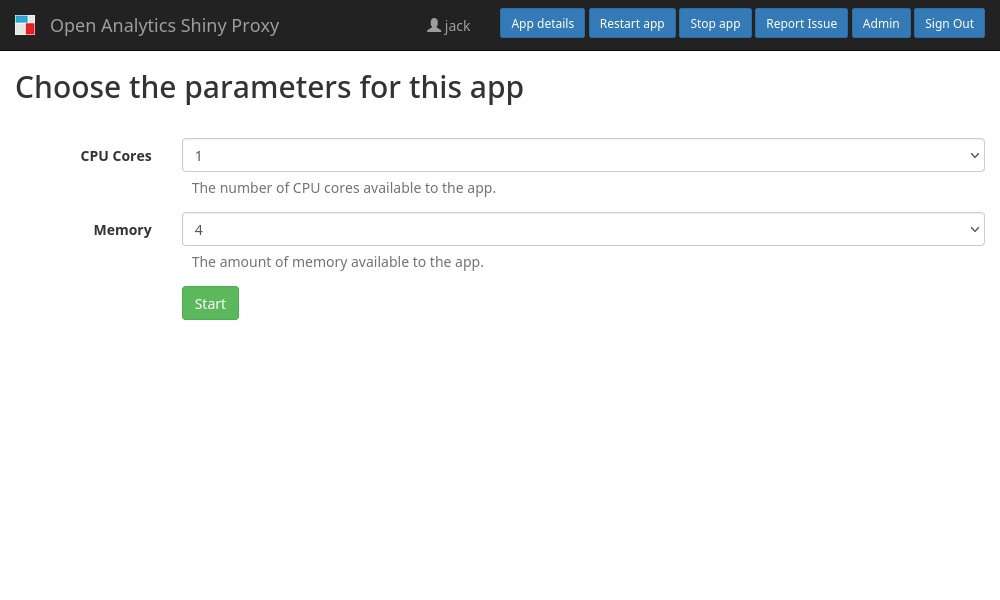
Default values
This final example demonstrates how to use a default value for each parameter by
adding the default-value property to the parameter definition:
- id: 01_hello
  container-image: openanalytics/shinyproxy-demo
  container-memory-limit: "#{proxy.getRuntimeObject('SHINYPROXY_PARAMETERS').getValue('memory')}G"
  container-cpu-limit: "#{proxy.getRuntimeObject('SHINYPROXY_PARAMETERS').getValue('cpu')}"
  parameters:
    definitions:
      - id: cpu
        display-name: CPU Cores
        description: The number of CPU cores available to the app.
        default-value: 1
      - id: memory
        display-name: Memory
        description: The amount of memory available to the app.
        default-value: 4
    value-sets:
      - values:
          cpu:
            - 1
            - 2
          memory:
            - 4
            - 8
            - 16
When starting the app, the default value of each parameter is already selected,
therefore the app can immediately be started by clicking Start:
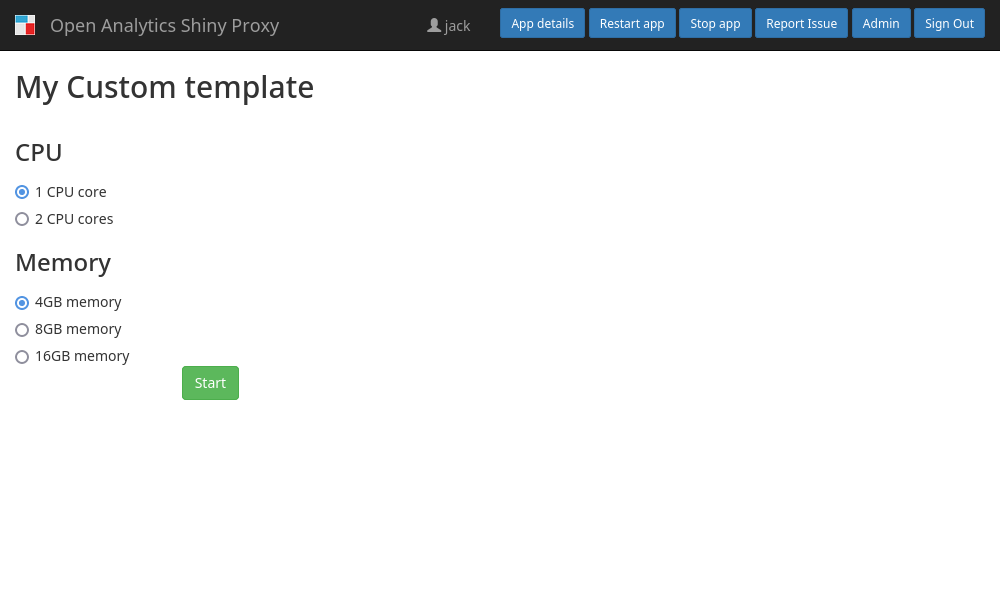
Custom template
It’s possible to override the auto-generated form using a custom template. The idea is that the template gets rendered at the same place as the auto-generated form. ShinyProxy doesn’t make any assumptions on the contents or logic of the template, instead at some point the template has to call a JavaScript function to start the app. This function expects a JavaScript object, with an entry for every parameter:
var memory = "4"
var cpu = "2"
Shiny.app.startAppWithParameters({
    "memory": memory,
    "cpu": cpu
});
What follows is a complete example of a template that uses radio buttons instead of select boxes:
- id: 01_hello
  container-image: openanalytics/shinyproxy-demo
  container-memory-limit: "#{proxy.getRuntimeObject('SHINYPROXY_PARAMETERS').getValue('memory')}G"
  container-cpu-limit: "#{proxy.getRuntimeObject('SHINYPROXY_PARAMETERS').getValue('cpu')}"
  parameters:
    template: |
      <div class="container">
        <div class="row">
            <h2>My Custom template</h2>
        </div>
        <div class="row">
            <form class="form-horizontal" id="myCustomForm">
                <h3>CPU</h3>
                <div class="radio">
                    <label>
                        <input type="radio" name="cpu" id="cpu1" value="1" checked>
                        1 CPU core
                    </label>
                </div>
                <div class="radio">
                    <label>
                        <input type="radio" name="cpu" id="cpu2" value="2">
                        2 CPU cores
                    </label>
                </div>

                <h3>Memory</h3>
                <div class="radio">
                    <label>
                        <input type="radio" name="memory" id="memory4" value="4" checked>
                        4GB memory
                    </label>
                </div>
                <div class="radio">
                    <label>
                        <input type="radio" name="memory" id="memory8" value="8">
                        8GB memory
                    </label>
                </div>
                <div class="radio">
                    <label>
                        <input type="radio" name="memory" id="memory16" value="16">
                        16GB memory
                    </label>
                </div>

                <div class="form-group">
                    <div class="col-sm-offset-2 col-sm-10">
                        <button type="submit" class="btn btn-default btn-success">Start</button>
                    </div>
                </div>
                <script>
                    document.getElementById("myCustomForm").addEventListener('submit', function() {
                        Shiny.app.startAppWithParameters({
                            "memory": document.querySelector('input[name="memory"]:checked').value,
                            "cpu": document.querySelector('input[name="cpu"]:checked').value,
                        });
                    });
                </script>
            </form>
        </div>
      </div>
    definitions:
      - id: cpu
        display-name: CPU Cores
        description: The number of CPU cores available to the app.
        default-value: 1
      - id: memory
        display-name: Memory
        description: The amount of memory available to the app.
        default-value: 4
    value-sets:
      - values:
          cpu:
            - "1"
            - "2"
          memory:
            - "4"
            - "8"
            - "16"
The template can use any variable available to the template for the app page, see the examples on GitHub.
Reference
All the configuration options in this section should be specified under
the parameters key of an app. See the above examples.
definitions: a list of parameter definitions, each definition can have the following options:id: (required) an identifier for the parameterdisplay-name: (optional) a user-friendly string shown instead of the iddescription: (optional) a user-friendly and longer description of the parameter, supports HTML codevalue-names: (optional) a list of user-friendly names (i.e. aliases) for values. When specified, the UI always show the specified name instead of the actual value. See the examples. Each entry should have the following properties:value: the value for which a user-friendly name should be shownname: the user-friendly name
default-value: (optional, but if specified it must be specified for every parameter) the value which is automatically selected when the form gets loaded. This default value is ignored when the user can’t use this value (or the combination).
value-sets: a list ofvalue-sets. For each parameter definition, a value-set contains a list of allowed values. Only the combinations defined within a singlevalue-setcan be selected by the user, see the examples. Each value-set can specify the following options:values: a map that contains an entry for each parameter definition. The key is the id of parameter, the value is a list of allowed values.access-control: limit usage of this value-set (see the example).groups: identical to the appaccess-groupsoptionusers: identical to the appaccess-usersoptionexpression: identical to the appaccess-expressionoption
name: identifier for the value-set, see the example
template: (optional) a custom HTML template to use instead of the auto-generated form, see the example
Security considerations
This feature deliberately requires that all possible values are hard coded in
the configuration file, instead of having free text input for users. This prevents that (simple) configuration mistakes cause severe
security issues. For example, if you would use such a parameter as part of
the container-image configuration option, this would allow anyone to launch
arbitrary docker images on your infrastructure. Similarly, if you would add a
parameter to configure a (filesystem) path, for example to mount a certain path,
this could induce a path-traversal attack. Although we could mitigate this risk
by introducing additional validation code, we believe the risks of such an
option is too high.